|
Link on image This tutorial is the property of Naise This translation is property of Micheleb-Graph
Material
Tubes de Naise Naise Mask 2 selections 1 tube text Filters VM Toolbox MuRa's Meister
Put your selections in your folders Colorize according to your colors Use a jpg image or a misted image for the background Color
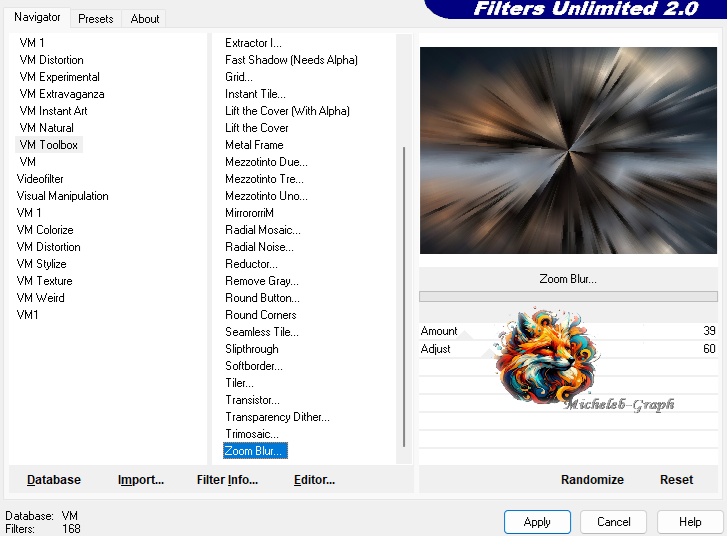
1 Open your image in jpg ou misted 2 Open a 1000 x 700 px transparent layer Selections - select all Copy and paste your image into the selection 3 Filtre VM Toolbox - Zoom Blur
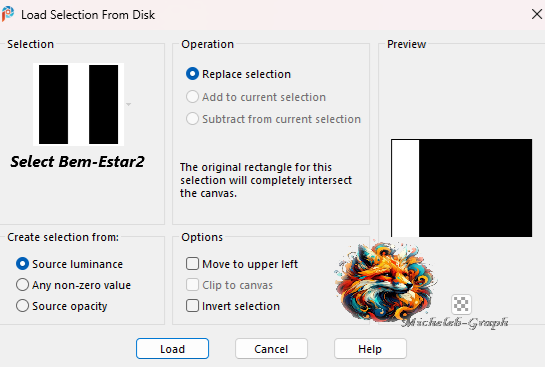
Selections - select none 4 Selection loaded from the disk Selection "Bem-Estar1"
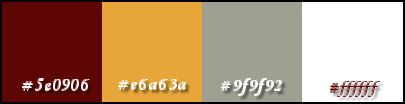
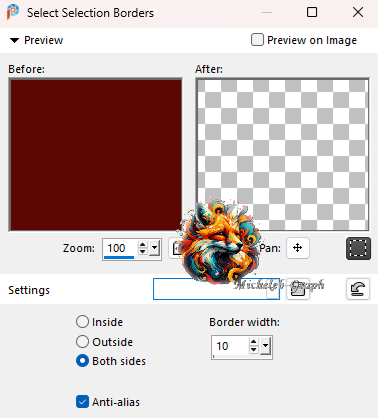
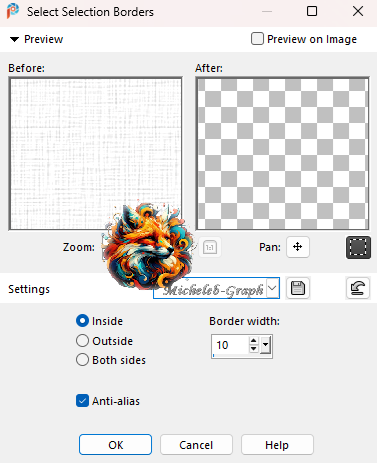
5 Layers - new layer Fill with a chosen color, here #5e0906 Selections - edit - select borders, on both sides
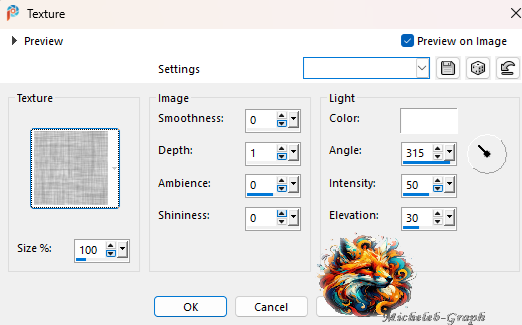
6 Layers - new layer Fill with another chosen color: #e6a63a 7 Interiror Beveling 3D Effect
Selections - select none Layers - merge - merge down 8 Select with the magic wand, all at 0, the center of the circle Layers - new layer 9 Open and copy your misted or image Paste into the selection You can duplicate it Layer - merge - merge down Selections- select none 10 Layers - merge - merge visibles layers 11 Adjustment, hue and saturation (see according to your colors)
12 Layers - new layer Selections loaded from disk "Bem-estar2"
Fill in the selection with white: #ffffff 13 Effects - Textural effects - fine hatching
Layer opacity at 42% 14 Selection edit, select borders, interior
Layers - new layer Fill in the selection with white #ffffff Layer - merge - merge down Selections - select none 16 Effects - reflection effects - feedback (resonance)
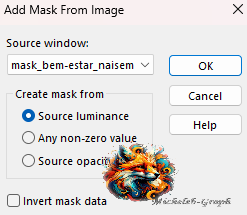
Duplicate layer Image - mirror - mirror horizontal Layers - merge - merge down 17 Go to the merged layer 18 Layer - new layer Fill with white Mask layer from an image "mask_bem-estar-naisem
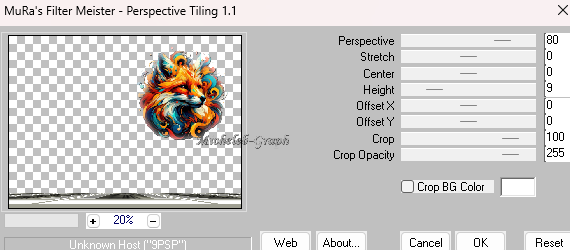
Duplicate layer Layers - merge - merge the group Blend mode: Soft light 19 Image - add a border of 20 px - color #9f9f92 40 px - color #ffffff 20 px - color #9f9f92 20 Duplicate layer 21 Filter MuRa's filter Meister - Perspective Tiling
22 Select the transparent part of the layer with the magic wand, progressive to 32
suppress on the keyboard 4 times Selections - select none 23 Open and copy the main tube Paste as new layer Image - resize: 130% Placement
24 Open and copy the BEM-ESTAR deco tube Paste as new layer Resize it to 90% Placement
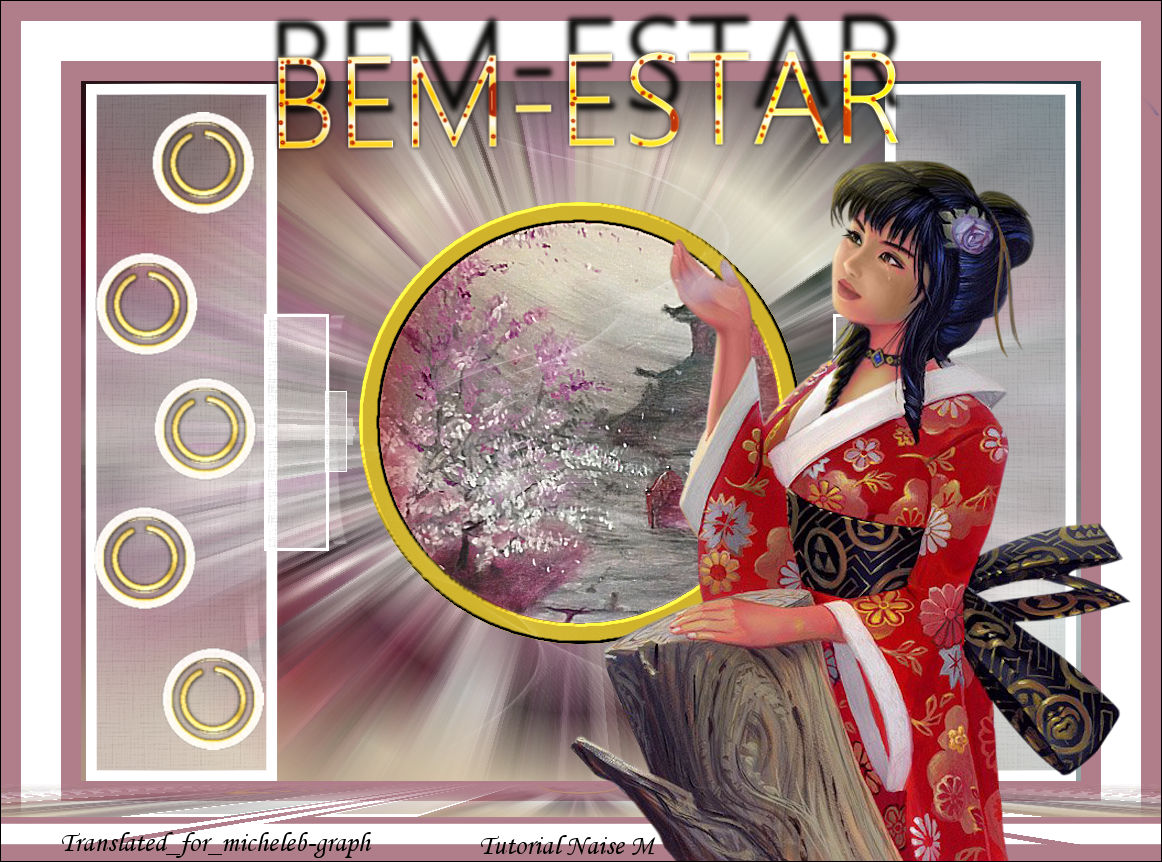
25 Open and copy the text tube Paste as new layer Place as in the final image or at your convenience 27 Image - add a border of 1 px - color #000000 Add your signature/watermark Add NaiseM watermark Add my watermark Translation Micheleb-graph Save in Jpg.
My version
Version of my tester Shawnee
Your image is finished You can send it to me by email
I will be happy to put it in the tutorial gallery
Gallery
|