|
Sewing life together de Naise par MicheleB
I thank Naise M for allowing me to translate his tutorial into English All tutorials are personal and created by Naise M, any similarities to others On the Net are purely coincidental. Tutorial created and translated with Psp 2020, but it can be done with other versions of Psp. Materials
Personal main tube Psp cube mask: Cas-Mask 0518-10 – thank you Preset Eye Candy 5 – Natural: Drip Eye Candy 5 – Texture: Waeve picture tubes: Red buttons Plugins MuRa’s Meister: Perspective Tiling Eye Candy 5 – Texture: Waeve Eye Candy 5 – Nature: Drip *Click on your presets and they will automatically place*
Choose a tube in accordance with the title of the tutorial Color
1 Open a 1000 x 650 px transparent layer 2 Select all Copy and paste the main tube into the selection Selections - Deselect 3 Effects – Images – Seamless mosaic
4 Adjusts – Gaussian Blur
5 Layers – New Layer Fill the layer with a chosen color Here it’s: #5e9a8a Layer move down 6 Activate Raster Layer 1 Duplicate Layer 7 Layer – Load/Save Mask – from disk Load cube mask or from an image
Layer – merge – merge the group 8 Layer – duplicate 9 Filter – MuRa’s Meister: Perspective Tiling
10 Black drop shadow 4/4/66/0/#000000 11 Go to Group Layer – copy Raster 1 12 Layers – new layer Apply another chosen color Here: #e9c4af 13 Layer – new mask layer – from an image Mask Cas-Mask 0518-10
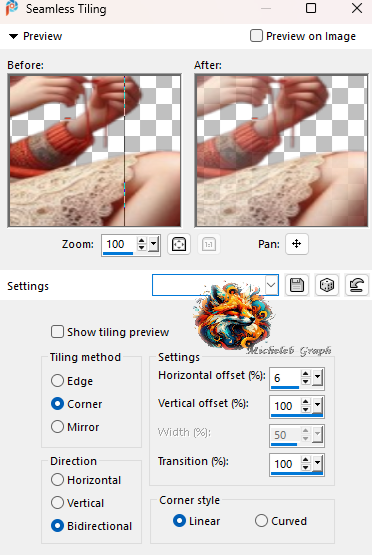
Merge the group 14 Layer – new layer Apply yet another chosen color Here: #5f9788 Apply the Castorke mask again Merge the group 15 Image – vertical mirror Merge with the layer below 16 Filter Eye Candy 5 – Texture – Waeve Apply Preset conturandoavida do Eye Candy 5 Layer move to the top of the stack 17 Image – add border 1 px – black color #000000 2 px – pink color #c79888 2 px – green color #629488 42 px of white #ffffff 18 Repeat borders 2 px – green color #629488 2 px – pink color #c79888 1 px – black color #000000 19 With the magic wand all to zero Select the 42 px border 20 Activate your main tube Window – duplicate Seamless mosaic image effect in memory Duplicate layer Horizontal mirror image Merge with the layer below Copy edition 21 Paste in your work selection Adjustments – Gaussian blur : 28 22 Layer – new layer (still selected) Fill with green #629488 23 Eye Candy 5 Texture – Weave Preset: consturandoavida
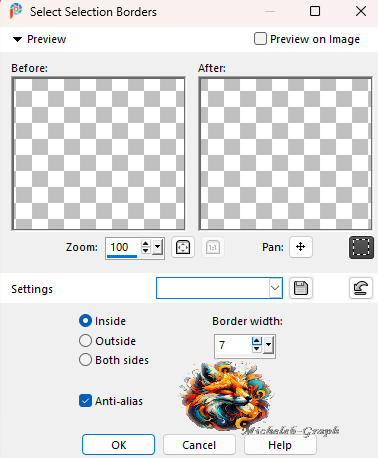
Soft light or other mode, depending on 24 Selections – modify – select borders
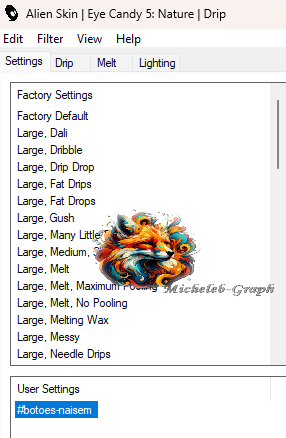
25 Layer – new layer Fill in the selection of a chosen Color Here: #c2240f Selections – deselect 26 Drop Shadow in memory 27 Layers - new layer Picture tube tool – apply button red or any other type of button Look at the model And fit a few sizes on your buttons and slots According to your tastes Merge your layers from your duplicate buttons 28 Eye Candy 5 – Nature – Drip Filter Preset: botoes-naisem
Position yourself on the Raster 2 layer Repeat filter Eye Candy 5 - Nature - Drip 29 Copy and paste the main tube 30 Copy and paste the text tube Colorize and placement of your choice Sign, merge and save as a jpg.
Ma version
Ma testeuse : Shawnee
Your image is finished You can send it to me by email
I will be happy to put it in the tutorial gallery
Gallery
|
_original.jpg)


_micheleb-graph.jpg)

