I thank Naise M for allowing
me to translate her tutorials into English Tutorial created and translated on Psp 2020 All copyright
Material :
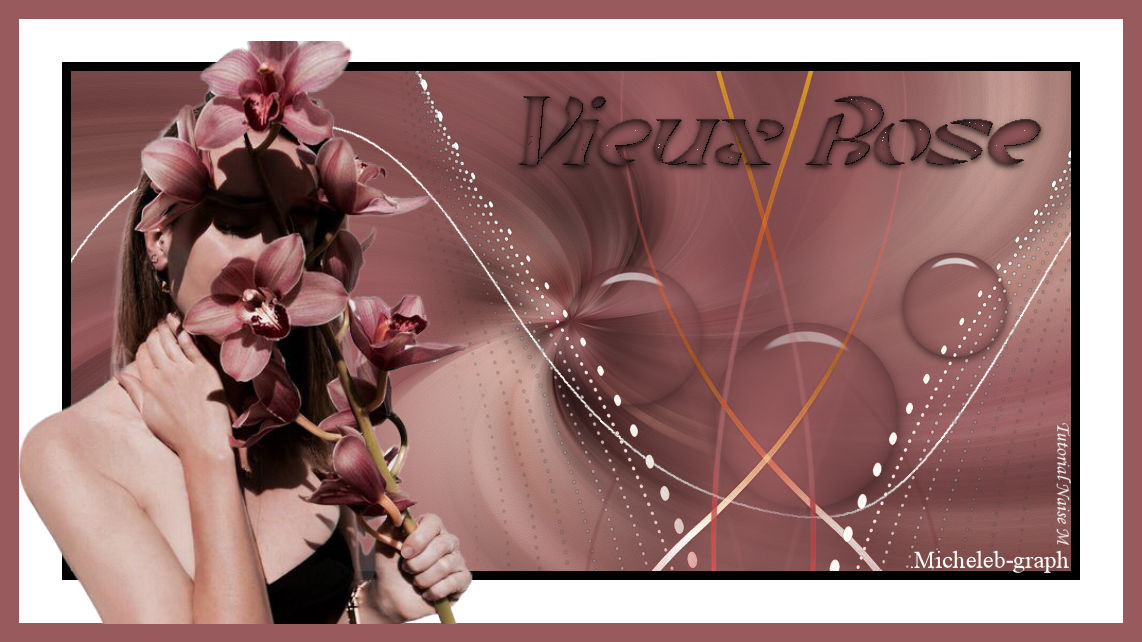
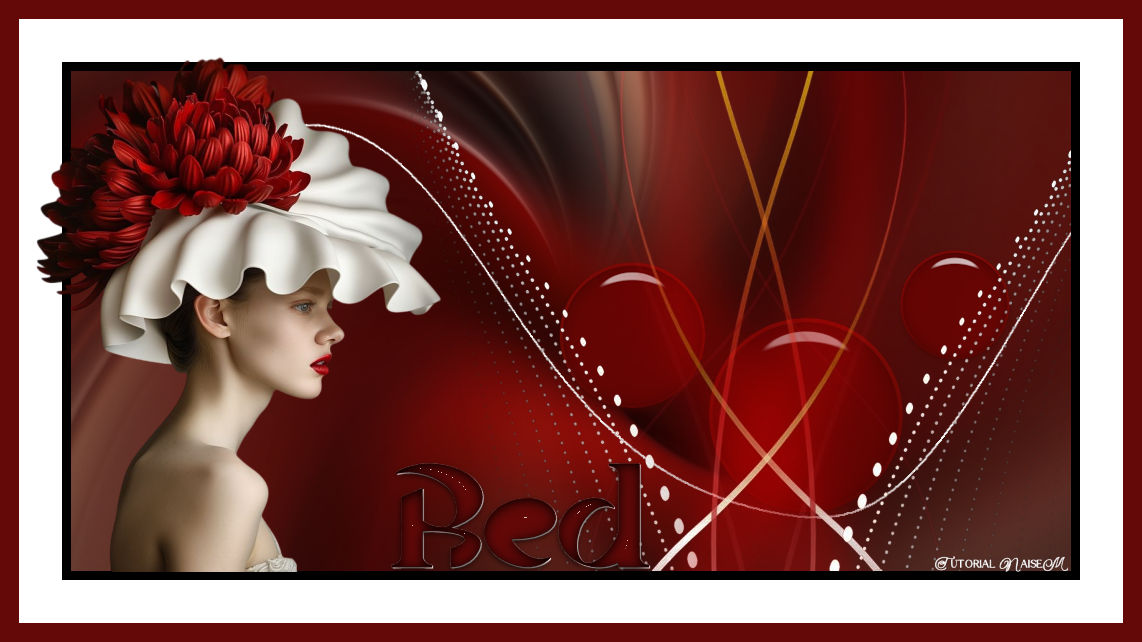
Image of your choice Main tube of your choice NaiseM font: Tarsica Decos of my authorship Selection - save in the selections folder Note This tutorial will be a little different from the others! The goal is that your favorite color is also highlighted in the tube and title. Here are two examples for further understanding DEAR TANSLATORS CHOOSE YOUR IMAGES AND YOUR TUBES. AND THE TITLE WILL BE THE COLOR YOUR USED. WATCH MY TWO TUTORIALS. HUGS AND THANKS TO You
NAISE M Filters
Presets - click 2 times - will automatically go inside the plugin Eye Candy 5 - Impact - Glass
Colors: foreground: #000000
Background: #640908
1
Choose an image that predominates your favorite color Edit - copy 2
Open a transparent 1000 x 500 px Edit - past as a new layer 3
Effects - image effects - seamless mosaic *By default*
4
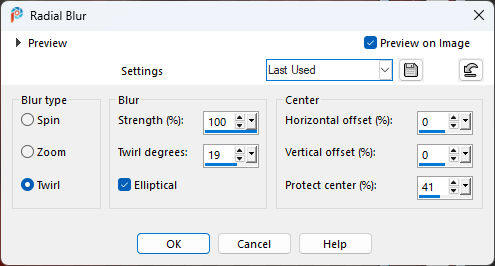
Adjust - blur - radial blur
5
Activate the Raster layer1
6
Apply a solid color - that of NaiseM: #640908
Layers - merge - merge
visible layers 7
Effects - Edge - Edge
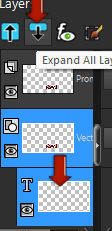
enhance 8
Past as a new layer
9
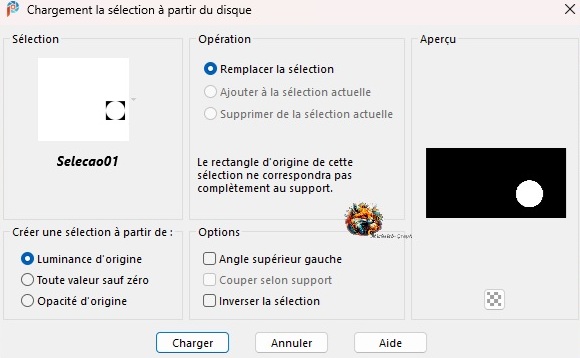
Selections - disc - selecao01
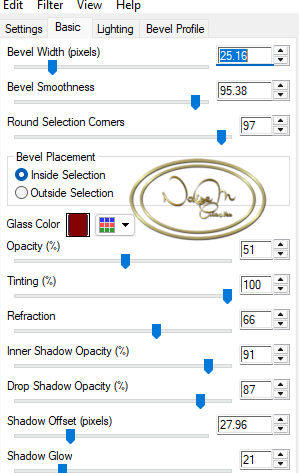
10 Filters - Alien Skin - Eye Candy 5 - Impact - Glass Apply the #preset1 - foreground color
Selections - select none Position X: 620 - Y: 236 11 Layers - duplicate 12 Image - resize 75% Position X: 475 - Y: 183 13 Layers - duplicate 14 Resize 75% Position X: 819 - Y: 173 15 Layers - merge - merge 2x layer from below 16 Open and copy the deco_02 Past as new layer Color to your taste 17 Position X: 215 - Y: -408 18 Image - add border Size 9 - color #000000 Size 43 - color #ffffff Size 19 - color #640908 19 Put the #ffffff color in the foreground And the color of your choice in the background And write your texte with the fond of your choice NaiseM put #ffffff in the foreground and #640908 in the background NaiseM chose: Tarsica 20 Activate your magic wand tool Select the central part of the letters
Keep the selection, make a light drop shadow 1/1/100/1 - color #ffffff Filter - Alien Skin - Eye Candy5 - Impact - Glass Then applied the #Preset2 Selections - select none 21 Click on Expand all layer and Cut in the 3rd selection
22 Position X: 385 - Y: 457 23 Open and copy your hand tube Past as a new layer Position on the left 24 Apply your signature Apply NaiseM's signature Apply my signature Translation Micheleb-graph 25 Save as. Jpg
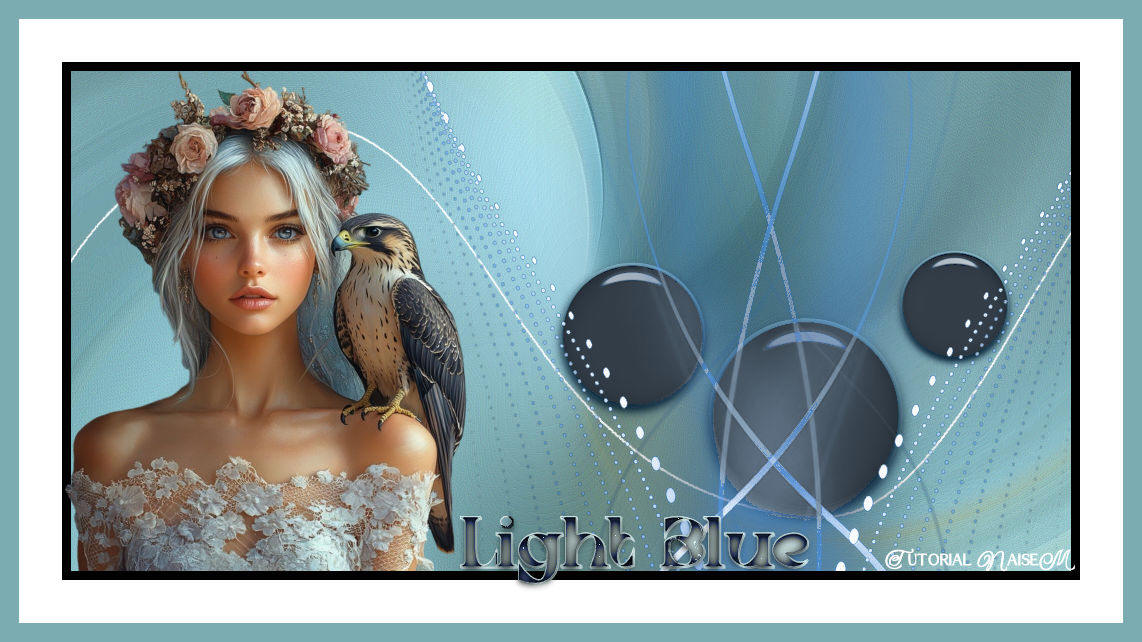
Template 2 - Light blue color
created the 19-08-2025 - Translated the 22-08-2025
Your creation is finished, you can send it to me by email.
My version :
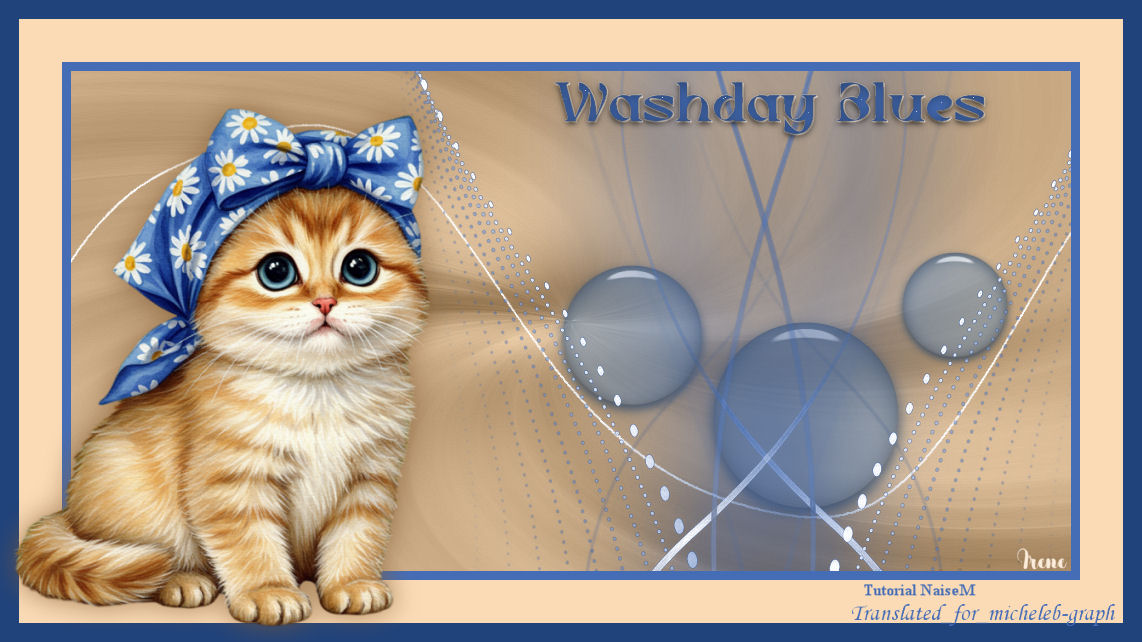
Version of my tester :
I rène
Gallery Index  Ce(tte) œuvre est mise à disposition selon les termes de la Licence Creative Commons Attribution - Pas d’Utilisation Commerciale - Pas de Modification 3.0 France. |