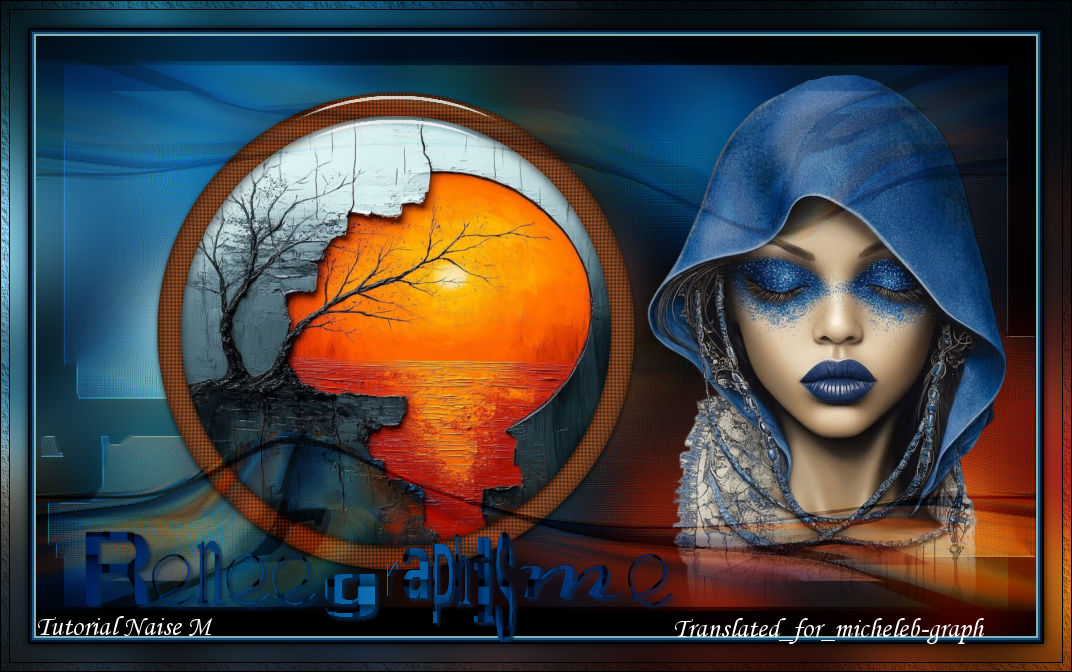
Thank you to Riet for her woman song and to Renée for her landscape song


I thank NaiseM for allowing me to translate their tutorials into English.

The link to the original lesson HERE

Material


Double-click on the preset; it will install automatically.

Place the "#renee" selection in the "selections" folder of your PSP

Open and duplicate your tubes, close the originals

Remove the watermarks on COPIES
Used Filters


Unlimited 2.0 - Graphics Plus

Alien Skin - Eye Candy5 - Impact - Glass

MuRa’s Meister - Tiling Perspective


Install the filters you don’t have before opening your PSP.


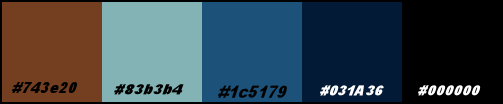
Colors


1

Open image "53bc7510d25d2dbd2870d808bbc6e5e9"

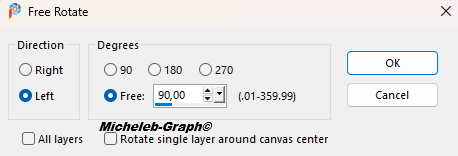
Image - free rotation


Copied

2

Open a new transparent image of 1000 x 600 px

Selections - select all

Paste into Selection

3

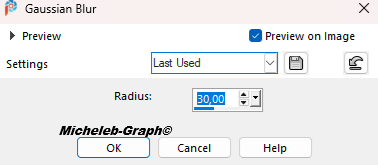
Adjust - blur - Gaussian blur to 30


4

Layers - new layer

5

Open and copy "deco1_renee"

Paste into Selection

Fusion mode - Soft light

Layers - duplicate

6

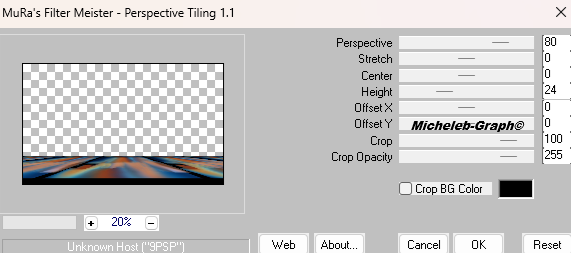
Filters - MuRa’s Meister - Tiling Perspective


7

Layers - duplicate

8

Image - mirror - vertical mirror

9

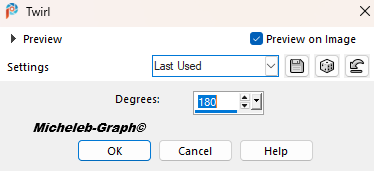
Effects - distortion effects - Twirl


10

Click on the eye of the Raster 2 layer to close it

11

Stay on the Copy Raster 2 layer

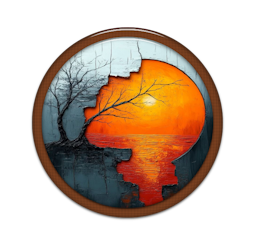
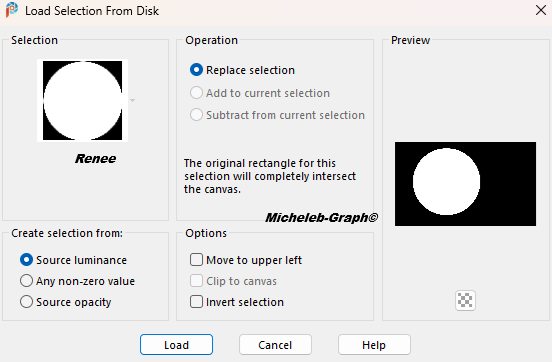
Selections - load from disk - apply the #Renée selection


Layers - new layer

Fill in with color #743e20

12

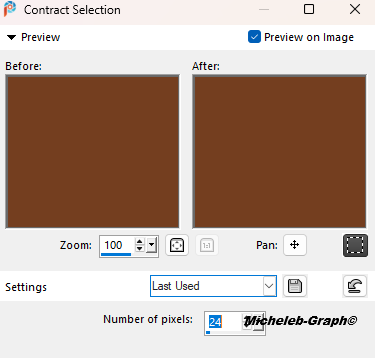
Selections - modify - contract from 24


13

Layers - new layer

14

Open and copy the exclusive_renee image

Paste into Selection

15

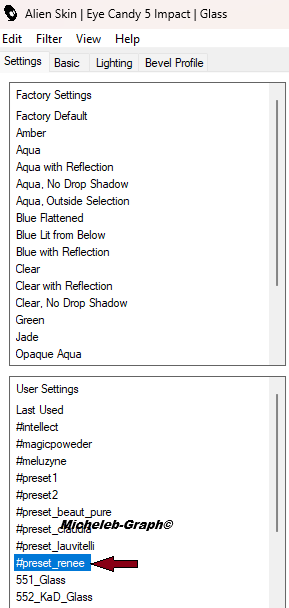
Filters - Alien Skin - Eye Candy5 - Impact - Glass

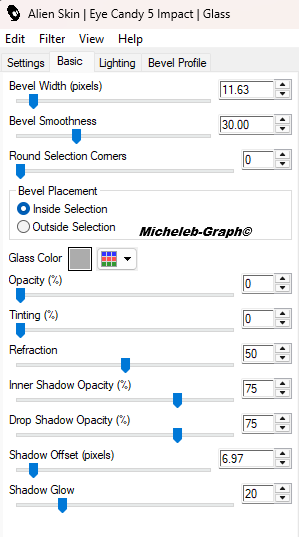
Apply the #preset_renee or enter the settings manually


16

Enable Raster Layer 3

17

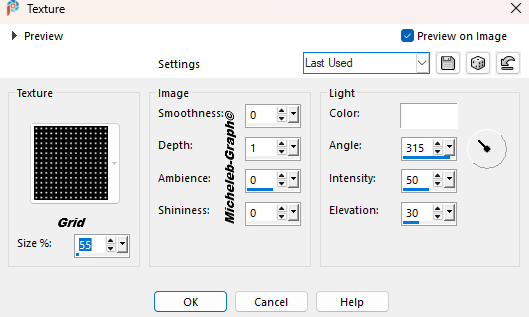
Effects - texture effects - Grid


18

Filters - Alien Skin - Eye Candy5 - Impact - Glass

Apply the #preset_renee again


19

Enable Raster Layer 4

Layers - merge - merge layer below

20

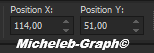
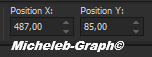
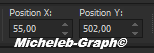
Position (K on your keyboard)


"M" to deactivate

21

Click again on the eye of the Raster 2 layer to make it visible

Fusion mode - Soft light (normally it should already be there)

22

Open and copy the tube_exclusivo_renee

Paste as new layer

Position (K on your keyboard)


"M" to deactivate

23

Image - add borders

2 px - #83b3b4

2 px - #1c5179

2 px - #031a36

2 px - #000000

24

Open and copy the title "RenéeGraphisme"

or write it with the font of your choice

Paste as new layer

Position (K on your keyboard)


"M" to deactivate

25

Open the start image

Image - free rotation - as at the beginning

Copy

On your work

Selections - select all

26

Add your signature

Add NaiseM’s signature

Add my signature Translation Micheleb-Graph

27

Images - add borders

28 px - any color

Selections - reverse

Paste into Selection

28

Setting - blur - Gaussian blur (always in memory)

29

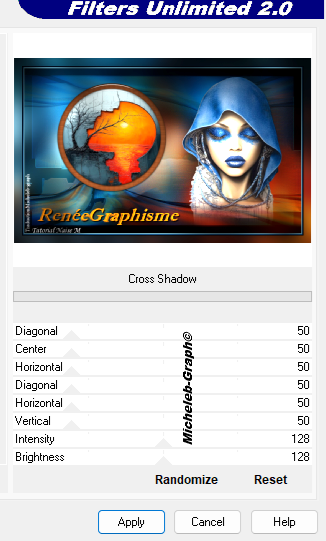
Filters - Unlimtied 2.0 - Graphics Plus - Cross Shadow


30

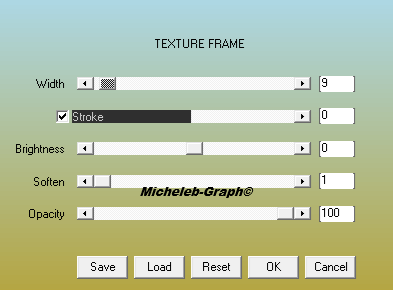
Filters - AAA Frames - Texture Frame


31

Selections - reverse

32

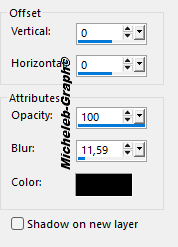
Effects - 3D - Drop Shadow


33

Save as. Jpg


Your image is finished, I hope you liked it.

Can you send it to me by email


Version of my tester

Irène


INDEX


Licence Creative Commons
Ce(tte) œuvre est mise à disposition selon les termes de la Licence Creative Commons Attribution - Pas d’Utilisation Commerciale - Pas de Modification 3.0 France.